Cacti tool is an open source web based network monitoring and system monitoring graphing solution for IT business. Cacti enables a user to poll services at regular intervals to create graphs on resulting data using RRDtool. Generally, it is used to graph time-series data of metrics such as network bandwidth utilization, CPU load, running processes, disk space etc.
Install Cacti in RHEL / CentOS / Fedora
In this how-to we are going to show you how to install and setup complete network monitoring application called
Cacti using
Net-SNMP tool on
RHEL 6.3/6.2/6.1/6/5.8,
CentOS 6.3/6.2/6.1/6/5.8 and
Fedora 17,16,15,14,13,12 systems using
YUM package manager tool.
Cacti Required Packages
The Cacti required following packages to be installed on your Linux operating systems like
RHEL /
CentOS /
Fedora.
- Apache : A Web server to display network graphs created by PHP and RRDTool.
- MySQL : A Database server to store cacti information.
- PHP : A script module to create graphs using RRDTool.
- PHP-SNMP : A PHP extension for SNMP to access data.
- NET-SNMP : A SNMP (Simple Network Management Protocol) is used to manage network.
- RRDTool : A database tool to manage and retrieve time series data like CPU load, Network Bandwidth etc.
Installing Cacti Required Packages on RHEL / CentOS / Fedora
First, we need to install following dependency packages one-by-one using
YUM package manager tool.
Install Apache
# yum install httpd httpd-devel
Install MySQL
# yum install mysql mysql-server
Install PHP
# yum install php-mysql php-pear php-common php-gd php-devel php php-mbstring php-cli php-mysql
Install PHP-SNMP
# yum install php-snmp
Install NET-SNMP
# yum install net-snmp-utils p net-snmp-libs php-pear-Net-SMTP
Install RRDTool
# yum install rrdtool
Staring Apache, MySQL and SNMP Services
Once you’ve installed all the required software’s for
Cacti installation, lets start them one-by-one using following commands.
Starting Apache
# /etc/init.d/httpd start
OR
# service httpd start
Starting MySQL
# /etc/init.d/mysqld start
OR
# service mysqld start
Starting SNMP
# /etc/init.d/snmpd start
OR
# service snmpd start
Configure Start-up Links
Configuring
Apache,
MySQL and
SNMP Services to start on boot.
# /sbin/chkconfig --levels 345 httpd on
# /sbin/chkconfig --levels 345 mysqld on
# /sbin/chkconfig --levels 345 snmpd on
Install Cacti on RHEL / CentOS / Fedora
Here, you need to install and enable
EPEL Repository. Once you’ve enabled repository, type the following command to install Cacti application.
# yum install cacti
Sample Output:
Loaded plugins: fastestmirror, refresh-packagekit
Resolving Dependencies
--> Running transaction check
---> Package cacti.noarch 0:0.8.8a-2.el6 will be installed
--> Finished Dependency Resolution

Dependencies Resolved

================================================================================
 Package    Arch  Version    Repository  Size
================================================================================
Installing:
 cacti                  noarch  0.8.8a-2.el6  epel            2.0 M

Transaction Summary
================================================================================
Install       1 Package(s)

Total download size: 2.0 M
Installed size: 5.4 M
Is this ok [y/N]: y
Downloading Packages:
cacti-0.8.8a-2.el6.noarch.rpm                           | 2.0 MB     00:40
Running rpm_check_debug
Running Transaction Test
Transaction Test Succeeded
Running Transaction
  Installing : cacti-0.8.8a-2.el6.noarch      1/1
  Verifying  : cacti-0.8.8a-2.el6.noarch      1/1

Installed:
  cacti.noarch 0:0.8.8a-2.el6

Complete!
Configuring MySQL Server for Cacti Installation
We need to configure
MySQL for
Cacti, to do this we need to set password for our newly installed
MySQL server and then we will create
Cacti database with user
Cacti. If you’re
MySQL is already password protected, then don’t need to set it again.
Set MySQL Password
To set new password for
MySQL server, use the following command. (
Note :
This is for new MySQL installation only).
# mysqladmin -u root password YOUR-PASSWORD-HERE
Create MySQL Cacti Database
Login into
MySQL server with newly created password and create
Cacti database with user
Cacti and set the password for it.
# mysql -u root -p
mysql> create database cacti;
mysql> GRANT ALL ON cacti.* TO cacti@localhost IDENTIFIED BY 'your-password-here';
mysql> FLUSH privileges;
mysql> quit;
Install Cacti Tables to MySQL
Find out the database file path using
RPM command, to install cacti tables into newly created
Cacti database, use the following command.
# rpm -ql cacti | grep cacti.sql
Sample Output:
/usr/share/doc/cacti-0.8.7d/cacti.sql
Now we’ve of the location of
Cacti.sql file, type the following command to install tables, here you need to type the Cacti user
password.
mysql -u cacti -p cacti < /usr/share/doc/cacti-0.8.8a/cacti.sql
Configure MySQL settings for Cacti
Open the file called
/etc/cacti/db.php with any editor.
# vi /etc/cacti/db.php
Make the following changes and save the file. Make sure you set password correctly.
/* make sure these values reflect your actual database/host/user/password */
$database_type = "mysql";
$database_default = "cacti";
$database_hostname = "localhost";
$database_username = "cacti";
$database_password = "your-password-here";
$database_port = "3306";
$database_ssl = false;
Configuring Apache Server for Cacti Installation
Open file called
/etc/httpd/conf.d/cacti.conf with your choice of editor.
# vi /etc/httpd/conf.d/cacti.conf
You need to enabled access to
Cacti application for your local network or per IP level. For example we’ve enabled access to our local LAN network
172.16.16.0/20. In your case, it would be different.
Alias /cacti    /usr/share/cacti

<Directory /usr/share/cacti/>
        Order Deny,Allow
        Deny from all
        Allow from 172.16.16.0/20
</Directory>
Finally, restart the
Apache service.
# /etc/init.d/httpd restart
OR
# service httpd restart
Setting Cron for Cacti
Open file
/etc/cron.d/cacti.
# vi /etc/cron.d/cacti
Uncomment the following line. The
poller.php script runs every
5mins and collects data of known host which is used by Cacti application to display graphs.
#*/5 * * * * cacti /usr/bin/php /usr/share/cacti/poller.php > /dev/null 2>&1
Running Cacti Installer Setup
Finally, Cacti is ready, just go to
http://YOUR-IP-HERE/cacti/ & follow the installer instruction through the following screens. Click
Next button.

Cacti Setup Screen
Please choose installation Type as “
New Install“.

Select Cacti New Install
Make sure all the following values are correct before continuing. Click
Finish button.

Cacti Installation Directories
Cacti Login Screen, enter username as admin and password as admin.

Cacti Login Screen
Once you’ve entered username and password, it will ask you to enter a new password for cacti.

Cacti Force Password Screen
Cacti Console Screen.

Cacti Console Screen
How to Create New Graphs
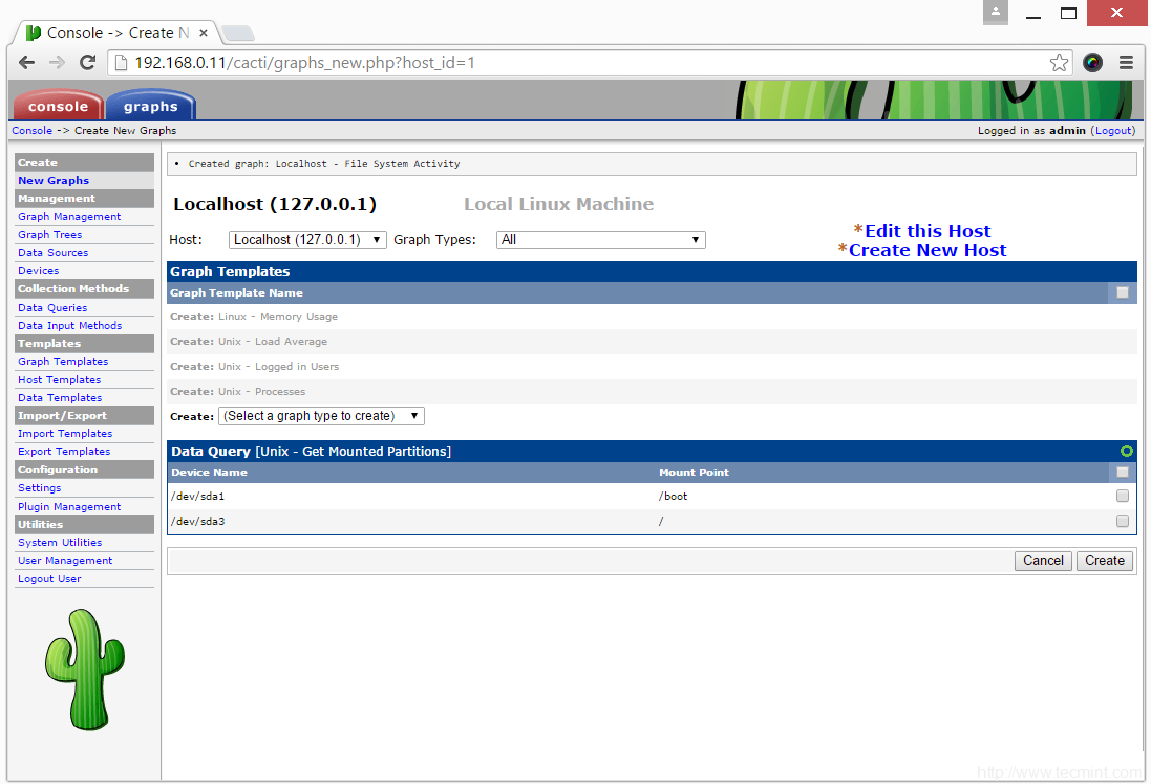
To create graphs, Click on
New Graphs –>
Select Host –>
Select SNMP –
Interface Statistics and Select a graph type
In/Out Bits. Click on
Create button. Please refer screen below.

source : http://www.tecmint.com/install-cacti-network-monitoring-on-rhel-centos-6-3-5-8-and-fedora-17-12/